Getting Started With Web Application Using ASP.NET Core 3.1 - Step By Step Instructions
Getting Started With Web Application Using ASP.NET Core 3.1 - Step By Step Instructions
There are a few step-by-step tutorials and blogs on the internet about creating ASP.NET Core 1.0 to ASP.NET Core 2.2. At the time of this writing, I couldn't find any complete guide for developing Web applications using ASP.NET 3.1. There were a couple of tutorials there but all of them are discussing 2.2 features and the history. Therefore, I thought of writing this tutorial as an updated edition of two of my previous blogs, Step By Step Guide For Creating ASP.NET Core 2.2 C# Web Application Using Visual Studio 2017 and Getting Started With Web Application Using ASP.NET Core 2.2 With Visual Studio 2017.
This blog is for demonstrating some basic steps to create a web application using ASP.NET Core 3.1 and then taking a closer look at the project items together with how the web app builds the WebHost for the application.
To follow this blog it is required to have the following:
- Basic knowledge of C# programming and understanding of HTML, CSS & JavaScript Web technologies.
- Latest Visual Studio 2019 (Community or any commercial edition) installed in the development computer. SQL Express is also required and comes with the Visual Studio installer. Remember to install it as well.
Note: I have marked red labels in the pictures shown in this tutorial for explanation purposes, those red typing or numbers are not actually shown in the actual Visual Studio windows on your computer.
Step1. Create a new project from Visual Studio
Open Visual Studio 2019. Previous editions of Visual Studio showed a startup tab inside the IDE whenever you open the IDE. In Visual Studio 2019, this startup tab is no longer available, instead, it opens a Start Window and then continues as a wizard to create a new project/ Open a project or solution/ open a local folder /Clone or check out code. The IDE will not show until you complete the following steps (wizard). The start page shows the Open recent project list and the Get Started list as you can see in the following figure.

Then it will show Create a new project window as shown below. It shows the Recent project templates list and available project template list.
We are going to use the ASP.NET Core Web Application template for this demonstration. Here is what it says:

In a later window in this wizard, we actually select the framework type and the actual project template. So this actually acts as a template category.

Select the ASP.NET Core Web Application template category, and click Next.
It will take you to the next window of the wizard "Configure your new project". In this window, we give names for the project and solution and select a path to the store. The solution is a container for one or more projects in Visual Studio.

Give the Project name and select the folder to store the project, and also give a Solution name.
The next wizard window "Create a new ASP.NET Core web application" shows a list of templates available. There are 2 Web Application templates.
In this sample, we will use a Web Application with ASP.NET Razor Pages.
Also note that here there are 2 drop-down boxes, one to select between ".NET Core" and ".NET Framework" and the other to select the ASP.NET Core version.
- Web Application - ASP.NET Core application with ASP.NET Razor Pages.
- Web Application(Model-View-Controller) - ASP.NET Core MVC
In this sample, we will use a Web Application with ASP.NET Razor Pages.
Also note that here there are 2 drop-down boxes, one to select between ".NET Core" and ".NET Framework" and the other to select the ASP.NET Core version.
Step1-a. Include Authentication
Then select the Web Application from the list of templates
and change the Authentication Method to “Individual User Accounts”. Don’t
forget to select the required version from the drop-down boxes, here we use .NET Core and ASP.NET Core 3.1
Changing the authentication to Individual user Accounts is optional. if the application does not need authentication, skip this part. Just click Create and go to Step 2

The diagram below shows the steps to follow to select individual user accounts.


Finally, it will create the project files for the selected Web Application template as shown in the figure below.


To run the application in debug mode press the green play button from the Toolbar or use the shortcut key F5.


Once you run the App IDE will compile the program and then open the App in the Web browser. During the compilation, it will show up messages in the output window and some animations on the bottom blue status bar.

And then show the output from the ASP.NET Core Web Server.


Step2. A glance at the IDE
Now we will take a look at the project we created using Visual Studio 2019 IDE.

- The top section is marked in a red rectangle numbered as 1, as usual with any traditional application that holds the command menu and toolbar.
- Section 2 is the main editor area. This is where the coding is done. All opened files are stacked here as tabs. This section in the above picture shows the information page created by the template wizard and is not required for the actual application.

- Section 3, Called "Solution Explorer" shows the folder or directory structure of the projects.

- Section 4 shows various messaging tabs, such as the output tab, Error list tab, Package Manager console, etc.

- Section 5 shows the properties of the selected item in the Solution Explorer.
- Section 6 is the status bar.
Step3. Running the Web Application
The project is ready to execute(run). The top of the IDE contains most of the common commands in the Menu bar and the Toolbar. The IDE provides two main modes to run the application, debug or without debug. Debug mode is the default selection in the VS2019 IDE.


or
To run the application without debugging select the Debug menu item and then select "Start Without Debugging" or use the shortcut keys Ctrl + F5
Once you run the App IDE will compile the program and then open the App in the Web browser. During the compilation, it will show up messages in the output window and some animations on the bottom blue status bar.

And then show the output from the ASP.NET Core Web Server.

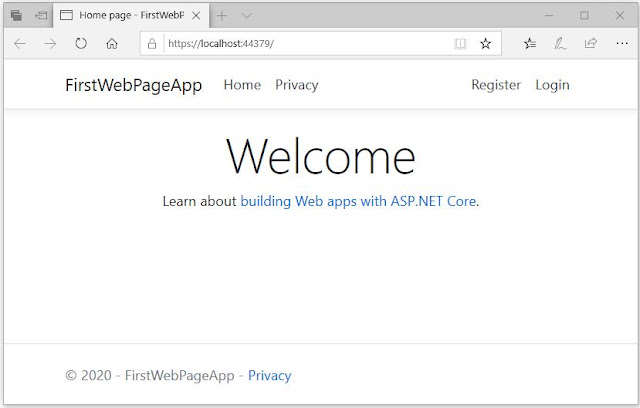
When running the App we created using the selected template shows the following website in the default web browser.

Step4. Examining The Project
The project we created using ASP.NET Razor Web Page Application is added to the solution, as shown in the Solution explorer, where it displays the folder structure. It has 3 main files and 7 folders.

Any project created using any ASP.NET Core Web application templates consists of Program.cs, Startup.cs & appsettings.json files and Connected Services, Dependencies & Properties folders. Since we used ASP.NET Core Razor Pages Web Application, there are a few more folders with files inside added to the project by the template wizard. Those are the wwwroot, Areas, Data and Pages folders.
Wizard adds a few more files inside all of those folders except the Connected Services folder. We will examine them when required.
Program.cs
The Program.cs file is the starting point of any ASP.NET Core Web Application created using the template wizard.
namespace FirstWebPageApp
{
    public class Program
    {
        public static void Main(string[] args)
        {
            CreateHostBuilder(args).Build().Run();
        }

        public static IHostBuilder CreateHostBuilder(string[] args) =>
            Host.CreateDefaultBuilder(args)
                .ConfigureWebHostDefaults(webBuilder =>
                {
                    webBuilder.UseStartup<Startup>();
                });
    }
}
This Program class has two methods:
The Main method is the first method to execute when the application is run. It calls another static method (rather an expression-bodied method) CreatHostBuilder(args) of type IHostBuilder which will create and configure a host builder object. And then calls Build and Run methods on that object to build the host and run the web application.
- public static void Main(string[] args)
- public static IHostBuilder CreateHostBuilder(string[] args)
The Main method is the first method to execute when the application is run. It calls another static method (rather an expression-bodied method) CreatHostBuilder(args) of type IHostBuilder which will create and configure a host builder object. And then calls Build and Run methods on that object to build the host and run the web application.
In other words, the host is configured and launched before the app is configured and started.
The host is responsible for app startup and lifetime management. The host is usually configured inside the CreateHostBuilder.
In the above code, it calls CreateDefaultBuilder and ConfigureWebHostDefaults methods on the host.
In the above code, it calls CreateDefaultBuilder and ConfigureWebHostDefaults methods on the host.
In .NET Core 3.x, a generic host can be configured for an HTTP workload or non-HTTP workload. Since we created a web application using the template, it was configured as an HTTP-workload host by using the ConfigureWebHostDefaults method.
The method name CreatHostBuilder should not be changed since the Entity Framework Core tools search for the CreatHostBuilder method that configures the host without running the application.
The host provides services that are available to the Startup class constructor. The app adds additional services via the ConfigureServices method in the Startup class. Both the host and app services are available in Configure method and throughout the app.
Startup.cs
The Startup class configures services and the Application's request pipeline.
namespace FirstWebPageApp
{
    public class Startup
    {
        public Startup(IConfiguration configuration)        {
            Configuration = configuration;
        }

        public IConfiguration Configuration { get; }

        // This method gets called by the runtime. Use this method to add services to the container.
        public void ConfigureServices(IServiceCollection services)
        {
            services.AddDbContext<applicationdbcontext>(options =>
                options.UseSqlServer(
                    Configuration.GetConnectionString("DefaultConnection")));
            services.AddDefaultIdentity<identityuser>(options => options.SignIn.RequireConfirmedAccount = true)
                .AddEntityFrameworkStores<applicationdbcontext>();
            services.AddRazorPages();
        }

        // This method gets called by the runtime. Use this method to configure the HTTP request pipeline.
        public void Configure(IApplicationBuilder app, IWebHostEnvironment env)
        {
            if (env.IsDevelopment())
            {
                app.UseDeveloperExceptionPage();
                app.UseDatabaseErrorPage();
            }
            else
            {
                app.UseExceptionHandler("/Error");
                // The default HSTS value is 30 days. You may want to change this for production scenarios, see https://aka.ms/aspnetcore-hsts.
                app.UseHsts();
            }

            app.UseHttpsRedirection();
            app.UseStaticFiles();

            app.UseRouting();

            app.UseAuthentication();
            app.UseAuthorization();

            app.UseEndpoints(endpoints =>
            {
                endpoints.MapRazorPages();
            });
        }
    }
}
This class is named Startup by convention. The Startup class includes the following:
- ConfigureService - method to configure the application's services.
- Configure - method to create the app's request processing pipeline.
appsettings.json
appsetting.json file is the default settings file or some refer to it as the configuration file or application configuration settings file, added when creating the Web Application project using the Template wizard.
{
  "ConnectionStrings": {
    "DefaultConnection": "Server=(localdb)\\mssqllocaldb;Database=aspnet-FirstWebPageApp-53bc9b9d-9d6a-45d4-8429-2a2761773502;Trusted_Connection=True;MultipleActiveResultSets=true"
  },
  "Logging": {
    "LogLevel": {
      "Default": "Information",
      "Microsoft": "Warning",
      "Microsoft.Hosting.Lifetime": "Information"
    }
  },
  "AllowedHosts": "*"
}
This file is loaded during host building by calling CreateDefaultBuilder in the CreateHostBuilder method. As we can see in the above code it has the connection string and Logging settings in JSON format. The default setting added to this file by the wizard depends on the template we select. Since we selected user accounts it added this connection string setting, if we use an empty project it will only add Logging settings, etc.
Folders added by the Template
Apart from the above 3 files, there are a few more files inside a few top-level folders. The added top-level folders by the Razor web page Web Application template are:
- Connected Services
- Dependencies
- Properties
- wwwroot
- Areas
- Data
- Pages.
The following figure shows the Windows Explorer folder structure of the project.

Now we take a look at the expanded folder Structure in the Solution Explorer window.

First, four top-level folders have special icons while other folders look similar to Windows Explorer folders. Except for Connected Services and Dependencies folders, all other folders are physical folders even though some of them have special icons in the Solution Explorer.
Connected Services
This folder keeps service references to other services that the applications need to communicate with. If you right-click and select...Add Connected Services will show the available service categories for the project
Dependencies
This folder keeps all assemblies related to the project. Inside Dependencies there are a few more subfolders namely Analyzers, Frameworks and Packages. For example, we can add service references or Nuget packages to the project and it will appear inside these folders depending on the selection. The packages folder shown in the above Solution Explorer figure shows the packages added to the project by the template.
The following packages are added to the project when Individual User Accounts options are selected during the project creation wizard:
- Microsoft.AspNetCore.Diagnostics.EntityFrameworkCore
- Microsoft.AspNetCore.Identity.EntityFrameworkCore
- Microsoft.AspNetCore.Identity.UI
- Microsoft.EntityFrameworkCore.SqlServer
- Microsoft.EntityFrameworkCore.Tools
Properties
The template adds the launchSettings.json file to the project. This file contains the project set to launch the application.
{
  "iisSettings": {
    "windowsAuthentication": false,
    "anonymousAuthentication": true,
    "iisExpress": {
      "applicationUrl": "http://localhost:55190",
      "sslPort": 44379
    }
  },
  "profiles": {
    "IIS Express": {
      "commandName": "IISExpress",
      "launchBrowser": true,
      "environmentVariables": {
        "ASPNETCORE_ENVIRONMENT": "Development"
      }
    },
    "FirstWebPageApp": {
      "commandName": "Project",
      "launchBrowser": true,
      "applicationUrl": "https://localhost:5001;http://localhost:5000",
      "environmentVariables": {
        "ASPNETCORE_ENVIRONMENT": "Development"
      }
    }
  }
}
To modify these settings we can manually edit this file, but the best way to edit the file is to use debug tab of the project properties graphical tab. We can access it by right-clicking on the project name in the Solution Explorer and selecting Properties from the context menu and then selecting the debug tab on the left to edit these project launching settings.

Any changes to the fields in the tab will be saved to the launchSetting.json file when the project is saved.
wwwroot
This folder contains all the files related to the UI. The following expanded wwwroot folder shows the available files.


This is where we keep all static files for the web UI. The template uses Bootstrap v4.3.1 and jQuery JavaScript Library v3.3.1 in Visual Studio 2019. These files can be updated or add new libraries using the "client-side Library" tool. In addition to these files, all web site related images or image folders should be stored inside the wwwroot folder
Areas
This folder and related files are added to this folder only when the Individual User Accounts option is selected during the project setup wizard. This adds the identity framework related _ViewStart.cshtml together with folder structure. If we use Identity Framework scaffolding to override defaults more folders and files will be added to the Identity subfolder in this Area folder.
Data
As the name implies this folder holds all the data-related files. This folder is also added when the Individual User Accounts option is selected during the project setup wizard. ASP.NET Core Identity Framework uses Microsoft Entity FrameworkCore. The following files are added:
- ApplicationDbContext
- Migrations/00000000000000_CreateIdentitySchema.cs
- Migrations/ApplicationDbContextModelSnapshot.cs
Pages
ASP.NET Core use the Pages folder to store all the Views-related razor syntax files and supporting files. Each Razor page consists of two files in the format fileName.cshtml and fileName.cshtml.cs. The Template added the following razor files:- Index.cshtml & Index.cshtml.cs
- Privacy.cshtml & Privacy.cshtml.cs
- Error.cshtml & Error.cshtml.cs
and the following supporting files (not paired with a .cs file):
- _ViewStart.cshtml
- _ViewImports.cshtml
- Shared/_Layout.cshtml
- Shared/_LoginPartial.cshtml
- Shared/_ValidationScriptsPartial.cshtml
_ViewStart.cshtml
This file indicates the layout file used for the application
@{
    Layout = "_Layout";
}
_ViewImports.cshtml
@using Microsoft.AspNetCore.Identity
@using FirstWebPageApp
@using FirstWebPageApp.Data
@namespace FirstWebPageApp.Pages
@addTagHelper *, Microsoft.AspNetCore.Mvc.TagHelpers
Hope you enjoyed the tutorial.
Reference:
- Generic Host:https://docs.microsoft.com/en-us/aspnet/core/fundamentals/host/generic-host?view=aspnetcore-3.1
- Startup Class:https://docs.microsoft.com/en-us/aspnet/core/fundamentals/startup?view=aspnetcore-3.1#the-startup-class
- Razor Pages:https://docs.microsoft.com/en-us/aspnet/core/tutorials/razor-pages/razor-pages-start?view=aspnetcore-3.1&tabs=visual-studio
and
https://docs.microsoft.com/en-us/aspnet/core/mvc/views/layout?view=aspnetcore-3.1


Comments
Post a Comment